Since I made this post, I stumbled upon this site where you can make your own neat-o buttons really easily, so I re-did mine. I'll leave this post up though for those who are curious about the process.
A few people have asked where I got these buttons for my shops:


I made them.
In this example, I'm going to show you how I link the first button from this blog to my Etsy shop.
Step 1: Make a button or grab a button. In this case, I made my own button.

Step 2: The next thing I did was host it on photobucket. You can host it on Flickr, too, or any other image site you want. So because this image is now hosted on photobucket, it has a web address: http://i381.photobucket.com/albums/oo259/riskybeads/Etsybar2.jpg
Step 3: Now let's look at code. This looks complicated, but it's really not. We're going to break it down. You know what a link looks like from step 2. "Hard-coding" a link in html is the code you use to make a word 'clickable.' This is the framework of that code. Please note that the * you see need to be taken out of the code when you use it.
<*a href=" target="_blank"*> <*/a>
Think of it as what the 'h'tml is 'referring to.' Let's do a simple example. I'll show you how I'm hard coding CraftyKids, the department I run at Handmadenews.org. Again, the * are there so that the code doesn't compile and leave you with just CraftyKids on the page as I'm trying to teach you this.
<*a href="http://www.handmadenews.org/department/index.php?did=20 target="_blank">Crafty Kids<*/a>
The pink is the link and the aqua is the words that I want to show on the page. The rest is code. The reason you see a target="_blank" is because I want that link to open in a new window when someone clicks it. I don't want them to have to leave my page. Click it in the above paragraph and you'll see.
Now let's take it to the next level and involve the button image. It gets a little more complicated, but we're going to break it down the same way. Again the * are only there to stop the code from compiling.
The first part you just learned:
<*a href="this is the link that where we want the reader to land target="_blank">this is what we want them to see on the page<*/a>
Now, for an image, instead of putting WORDS in the code as if you're hard coding a link in text, you put the link to the IMAGE that you want to see on the page.
<*a href="http://www.etsy.com/shop.php?user_id=5248866" target="_blank"*><*img border="0" alt="Etsy Blog Bar 2" src="http://i381.photobucket.com/albums/oo259/riskybeads/Etsybar2.jpg"/*><*/a>
Reading backwards, I'm color coding it to show you that the red is the basic link to my image, but the aqua in front of it tells the link that it's going to appear on the page as an image. My Etsy shop link in front of that tells it that when it does, it will lead people to my Etsy shop.
<*a href="link to your shop" target="_blank"*><*code specifying that link will appear as an image"link of image"/*><*/a>
That code came right out of photobucket. See below.
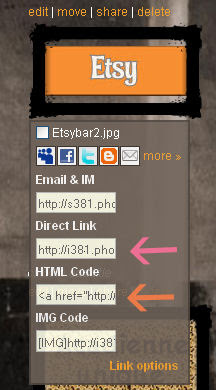
I got all of that info from the orange arrow. I just had to change what was originally in the red part and make it my Etsy shop. Photobucket doesn't know where I want my button to go. I did the same thing for all of my other buttons. You don't need to know all the fancy color coding; it's just helpful to know what the code is doing in case you have a snafu and you're baffled.
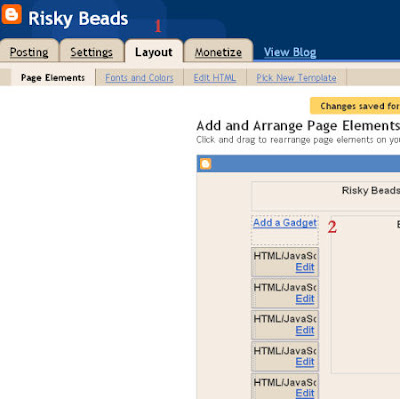
Step 4: Now that your code is ready, log into blogger and go to customize layout. Choose 'add a gadget' on your sidebar.
Step 4: Now that your code is ready, log into blogger and go to customize layout. Choose 'add a gadget' on your sidebar.
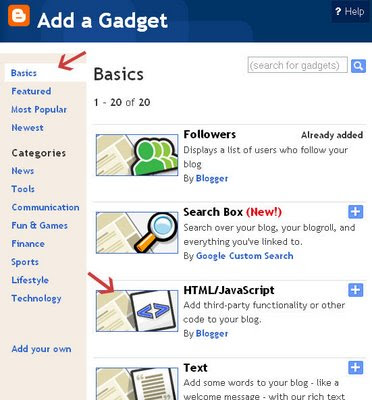
Next, choose 'HTML' under 'Basics.'
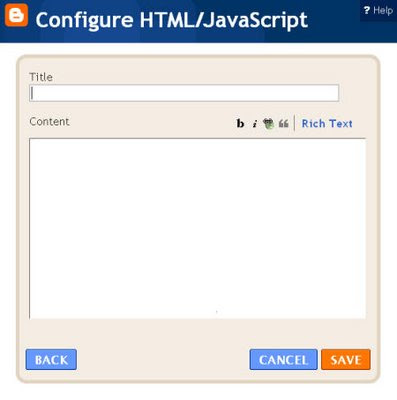
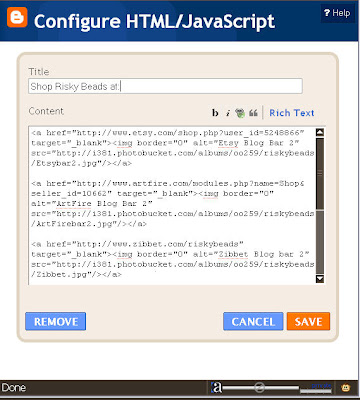
A dialog box will open up. This is where you'll paste your code.
There's no need to use the title space unless you want to. Just paste your code in. Here's what mine looks like but remember that mine has several buttons in it.
You can see where each one of my shops is listed in that code as you read down the page. I know this seems complicated, but after you've uploaded your image to flickr or photobucket a few times, you'll get the hang of it. Like I said, you're only really replacing one link in that case, just the link that comes after the "a href" as I call it and telling the image to point to your shop.
I do the same thing for every ad that runs on my blog or link to any other site. Once you know how to do it, you're good to go. Good luck and feel free to comment if you have questions.
~Lori
If you need someone to make buttons for you, I'll make you a set of up to 6 in your size and color choice for your blog for $15. Just email me riskybeads at gmail dot com. If you'd like even more information about running your shop in general, please click here.

Hello Risky Beads,
ReplyDeletethis is a very interesting tutorial of how to link images in your blog. For sure it always looks better and is more attractive to click on an image than on a pure text link which just says "Click here for my Online shop"!
Keep up the good work!
Awesome! Thanks. Finally got the crafykids badge up now.
ReplyDeletewow... you are so good at explaining this sort of thing to those of us who look at html and think eeeeeekkkk!! Nicely done.
ReplyDeletethank you thank you thank you thank you!!!
ReplyDelete